A good rule is to not exceed more than 80 of the rate maximum for the dimmer switch. Black wire power or hot wire white wire neutral bare copper ground when wiring a dimmer switch circuit all we want to do is to control the black wire hot wire to turn dimbrighten the load.
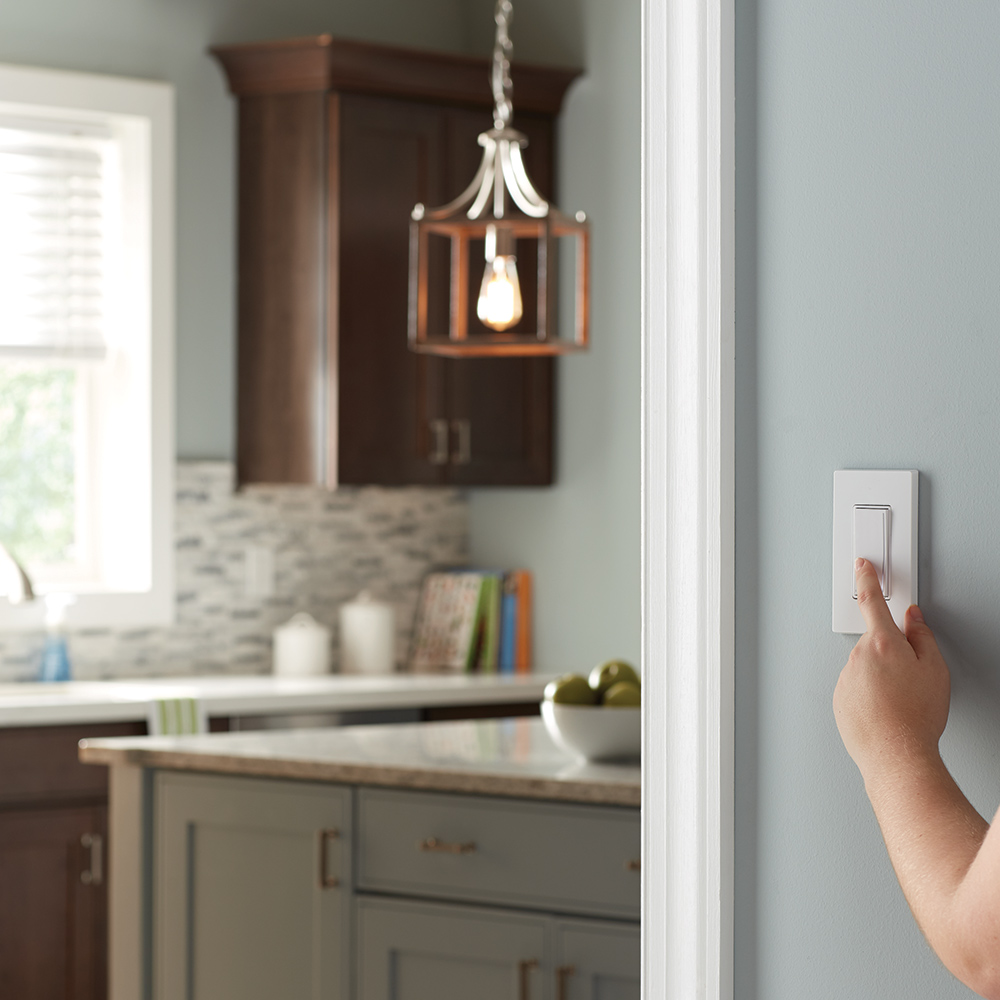
How To Install A Dimmer Light Switch Wiring And Replacement
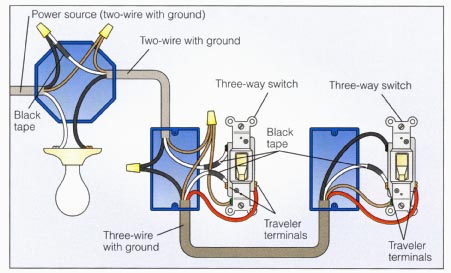
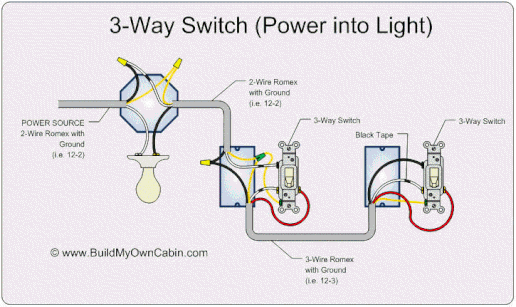
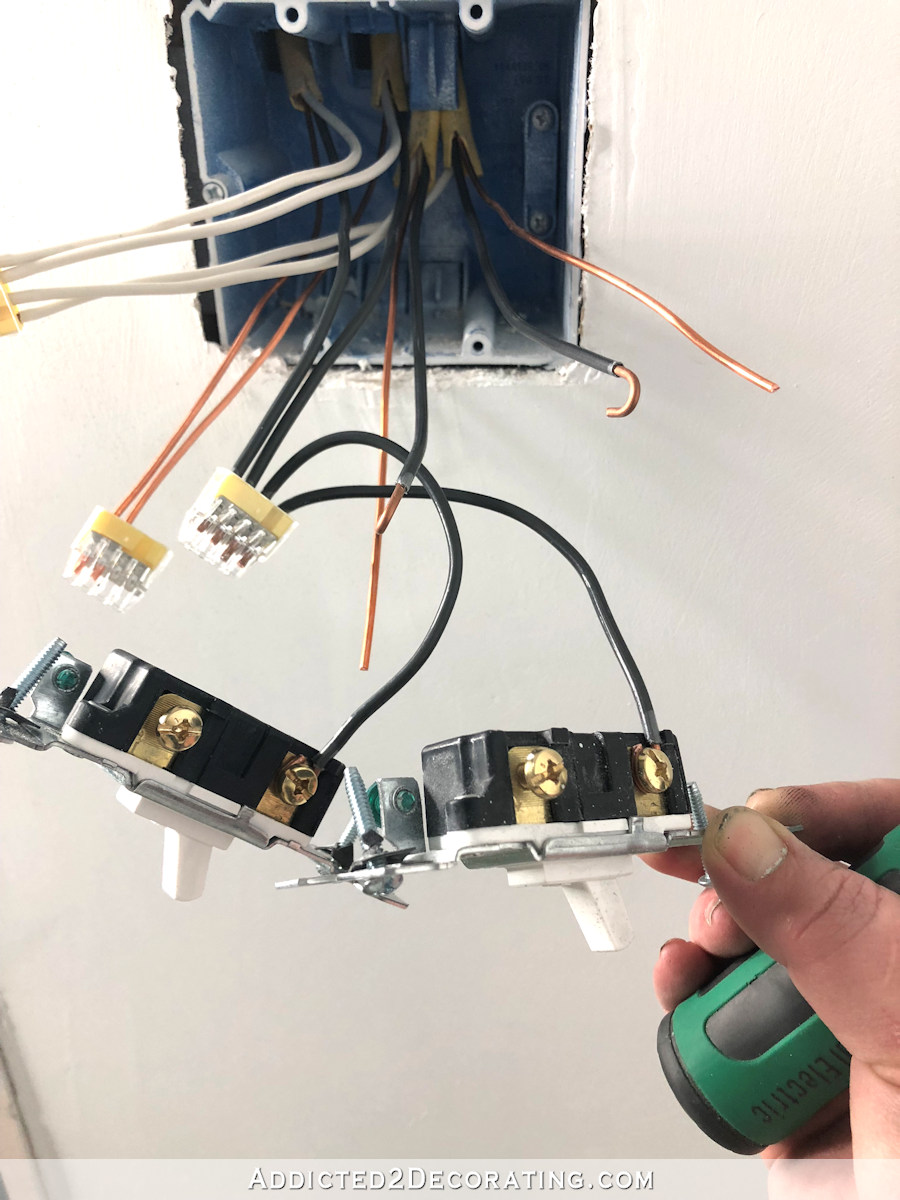
Installing a dimmer switch with 3 black wires. When installing dimmers for 3 way switches. The source hot wire is spliced to the common on the dimmer and the neutral is splice through to the light fixture. At the 3 way switch the white cable wire is marked black and connected to the common terminal. Install the dimmer. Fold the wires neatly into the box. Remove all wires from the 4 way switch and cap both red wires with wire nuts.
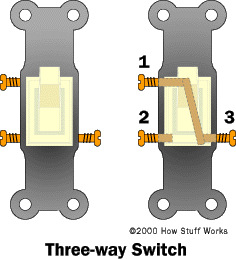
It doesnt matter if you reverse the two switch wires to a single pole dimmer. When buying a dimmer switch check the maximum load its rated for. Either loosen the screws or use the wire strippers to snip the ends off and remove the old switch. Screw the dimmer to the box with the screws provided. This simple diagram below will give you a better understanding of what this circuit is accomplishing. Remove 34 inch of casing from the end of the house wires and the dimmer switch wires if needed.
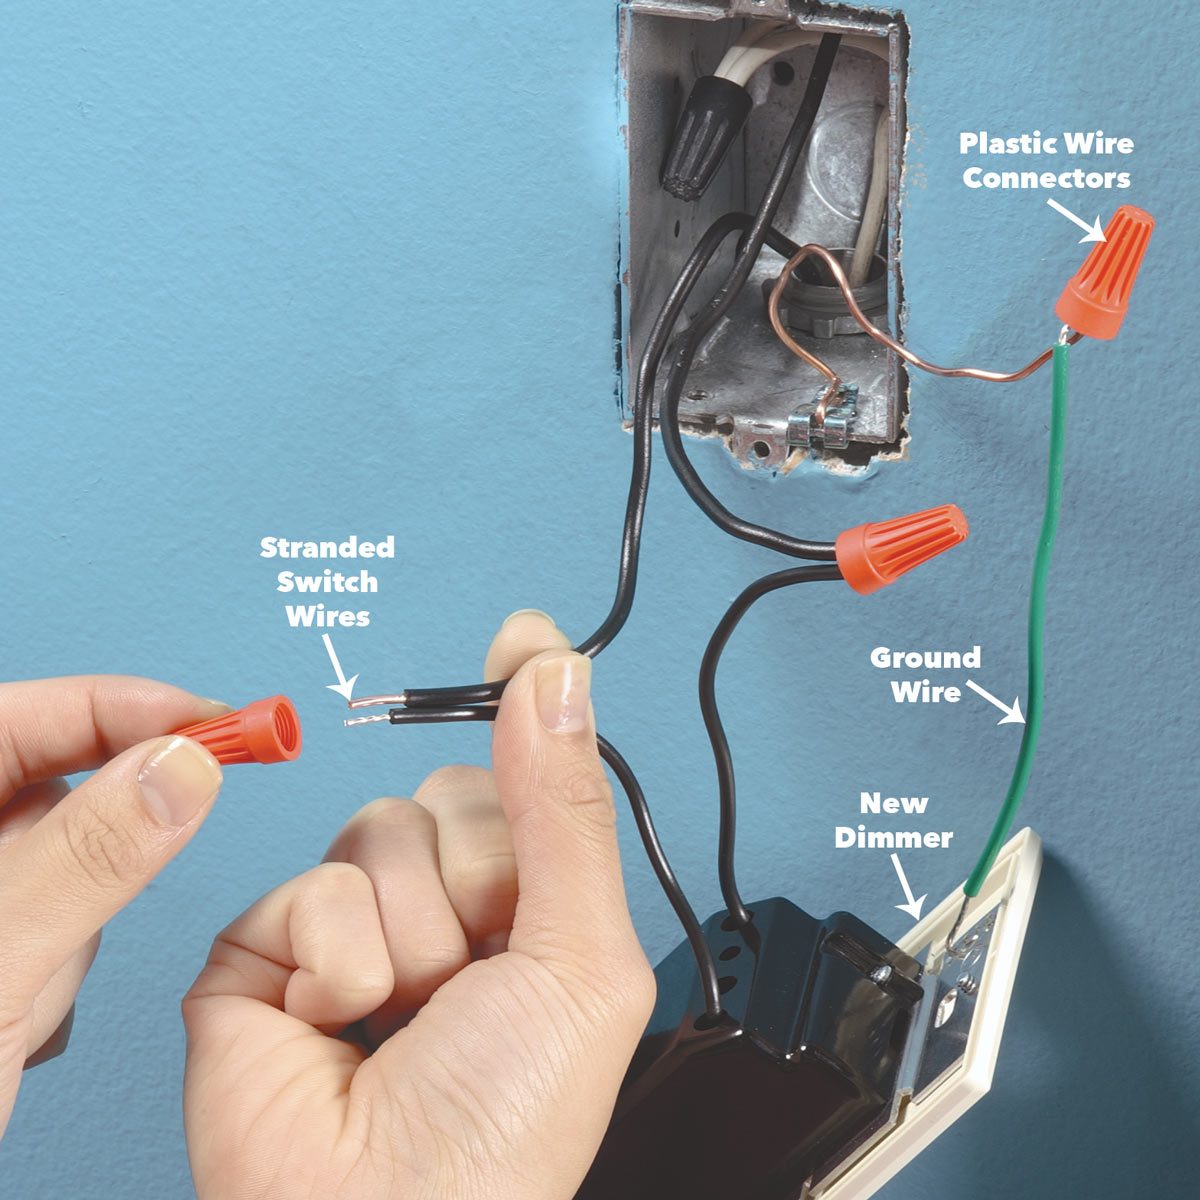
From the dimmer 3 wire cable runs to the other switch and 2 wire cable runs to the light fixture. Connect the black dimmer wire to your tagged common wire and remove the electrical tape. Finish the job by installing the cover plate and turning on the power to test the new dimmer. Wires going to the dimmer will be black and usually can be placed. Connect the ground wire from your dimmer to a green or bare copper wire in the wall box. For example if it has a limit of 600 watts you wouldnt want to install the dimmer on a switch that controls 8 100 watt recessed lights.
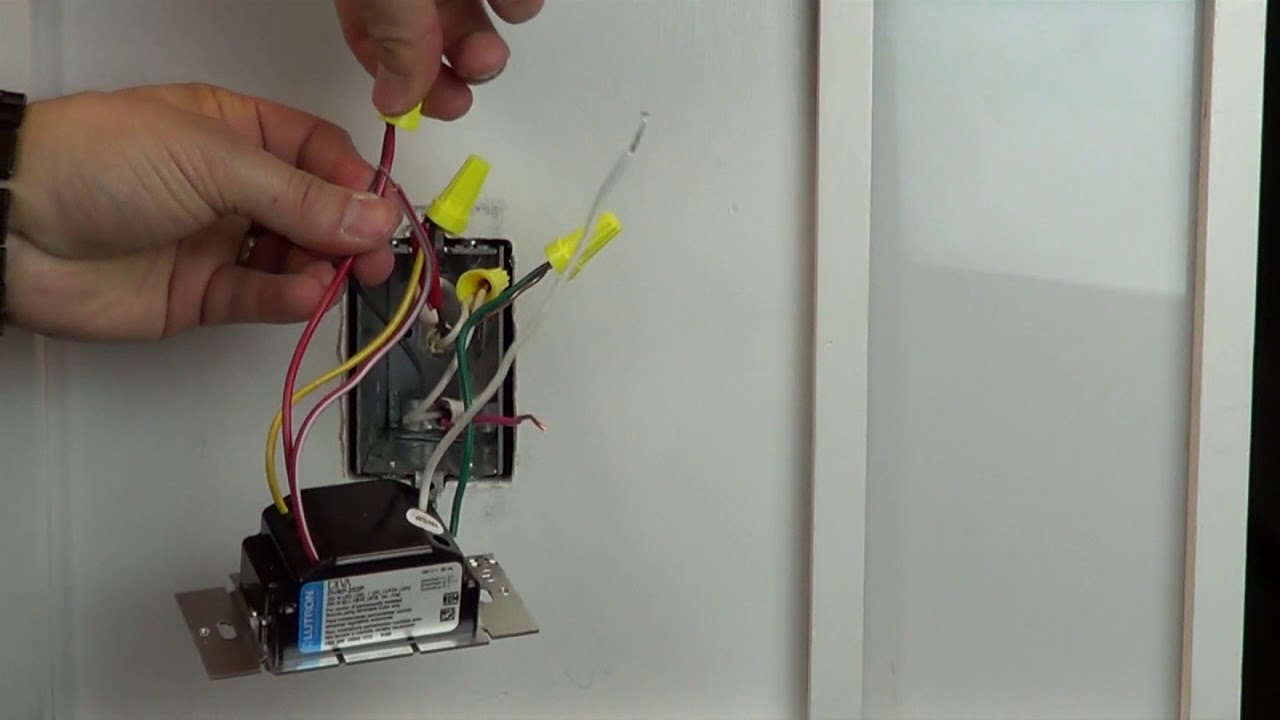
Then tie the 2 black wires along with the black line wire on the idevices dimmer switch together with a wire nut. Connect the two remaining dimmer wires called traveler wires separately to each remaining wire in your wall box. Twist the ends together clockwise and cap them using a wire connector nut.
Gallery of Installing A Dimmer Switch With 3 Black Wires